RCM 360 Wireless Receiver – Quickstart Guide
IMPORTANT NOTE: The RCM 360 Wireless Receiver features a dual-preset switch that allows you to change between instrument types. By default, mode “A” is set to GH Guitar and mode “B” is set to RB Drums.
If you ever want to switch between the two, make sure that the controller you were using first is OFF. Most Xbox 360 controllers cannot be turned off manually without removing the batteries. Once you’ve done that, resync the receiver and connect the other controller.
Initial Setup
Supported Platforms

Computers
- Windows
- Mac
- Linux (Includes Steam OS)
PlayStation
- PlayStation 2
- PlayStation 3
- PlayStation 4
- PlayStation 5

Xbox
- Xbox 360
- Xbox One
- Xbox Series

Nintendo
- Wii
- Switch
- Switch 2
Supported Input Devices
- Guitar Hero Guitars
- RedOctane Guitar Hero 3/A Les Paul for Xbox 360
- RedOctane Guitar Hero World Tour/Metallica Sunburst for Xbox 360
- RedOctane “Guitar Hero 5/Band Hero” for Xbox 360
- RedOctane Warriors of Rock guitar for Xbox 360
- Rock Band Guitars
- RB1, RB2, RB3, RBB wireless Stratocaster for Xbox 360
- RB Beatles Hoffner for fox Xbox 360
- RB Beatles Gretsch for Xbox 360
- Logitech Stratocaster for Xbox 360
- RB3 Telecaster for Xbox 360
- RB3 Precision Bass Wireless for Xbox 360
- Rock Band Drums
- Any wireless Rock Band drum kit (4 lane)
- Guitar Hero Drums
- Any Guitar Hero drum kit (5 lane)
- DJ Hero Turntable for Xbox 360
- Any wireless Xbox 360 gamepad
Supported Games
- PlayStation 2 REQUIRES RB GUITAR PRESET
- Guitar Hero games, World Tour and later
- Rock Band games are not fully tested
- PlayStation 3
- All Guitar Hero games
- All Rock Band games
- DJ Hero 1 & 2
- PlayStation 4 & PlayStation 5
- Rock Band 4
- Fortnite Festival (Keyboard mode)
- Xbox 360
- All Guitar Hero games
- All Rock Band games
- DJ Hero 1 & 2
- Xbox One & Xbox Series S/X
- Rock Band 4 (Authentication required)
- Fortnite Festival (Keyboard mode)
- Wii REQUIRES RB GUITAR PRESET
- Guitar Hero games, World Tour and later
- Rock Band 2
- Rock Band 3
- Rock Band Beatles
- Rock Band Green Day
- Nintendo Switch / 2
- Fortnite Festival (Read this guide)
Unsupported Games
- Wii / Dolphin
- Rock Band 1
- Rock Band Track Pack 1
- Rock Band Track Pack 2
- Guitar Hero 3 (Can be made to work on a modded Wii using this plugin)
- Guitar Hero Aerosmith (Can be made to work on a modded Wii using this plugin)
- Playstation 2
- Guitar Hero 1
- Guitar Hero 2
- Guitar Hero 3
- Guitar Hero Rocks the 80s
- Guitar Hero Aerosmith
Programming
Requirements
- RCM 360 Wireless Receiver
- USB-C cable
- A computer that uses Windows, macOS, or Linux
- The latest revision of RCM Programming Tool
- A compatible controller
The RCM 360 Wireless Receiver requires specific presets for specific instruments.
Guitars can use GH Guitar or RB Guitar presets.
- PS2 and Wii will require you to use the RB Guitar preset.
Drums use RB Drums or GH Drums depending on which game is being played.
- Example: Rock Band 2 uses RB Drum preset, while Guitar Hero World Tour uses GH Drums preset.
DJ Hero Turntables use the Turntable preset.
Gamepads use the Gamepad preset.
Click here for a step-by-step programming guide.
To change the preset of your RCM 360 Wireless Receiver, you must use the RCM Programming Tool. Click here to be taken to the download page.
- Open the RCM Programming Tool.
- Plug your RCM 360 Wireless Receiver into your computer. You will see it appear with “Configure” and “Reset to factory” buttons.
- Click “Configure“
- You will be taken the configuration page where, on the left side, there is a dropdown for you to change presets.
When switching to a different preset, click it, then click “Save Settings”.
- You will want to wait until the bar at the bottom reaches 100% and says Status: Done.

Final notes:
You will need to calibrate some things per instrument. See the following section for more details.
Instrument Setup and Tuning
All controllers tend to need calibration or tweaking of some type. In most cases, it’s the tilt and whammy.
Tilt Tuning
Click here for a step-by-step Tilt Tuning guide.
- First, we must open the USB Host Inputs dropdown menu.

- Scroll down to the tilt section. You’ll see this:

- Click Calibrate!
- Then, position your guitar in the position you play in. Click Next.
- After that, tilt your guitar up to the position you would like tilt to activate. Hold it there and click next.
- You’re done! Click Save Settings on the left side. After it’s done, give it a try! You can recalibrate it to your liking just by clicking Calibrate again.
Whammy Tuning
Whammy motion will not work properly until it is calibrated.
Click here for a step-by-step Whammy Tuning guide.
- First, we must open the USB Host Inputs dropdown menu.
- Scroll down to the guitar whammy section. You’ll see this:

- Click Calibrate!
- Then, don’t touch your whammy bar and then click Next.
- After that, push your whammy bar down as far as it can go without overdoing it. Hold it there, then click Next.
- Now you have to set Deadzone. Push the whammy bar in a little bit and you can see the value go up a little bit. Look for a point where the whammy won’t activate on it’s own. Hold it there, then click Next.
- You’re done! Click Save Settings on the left side. After it’s done, give it a try! You can manually adjust the deadzone with the sliders as well if you’d like to tweak your settings.

Drum Tuning
Usually drums will work great without any tuning, but it can help find the sweet spot for your style of play!
Click here for a step-by-step Drum Tuning guide.
- Sync your drum kit to the RCM 360 Wireless Receiver. Verify that it is properly connected by opening the USB Host Inputs dropdown and start pressing the menu buttons. They should light up in the programming tool.
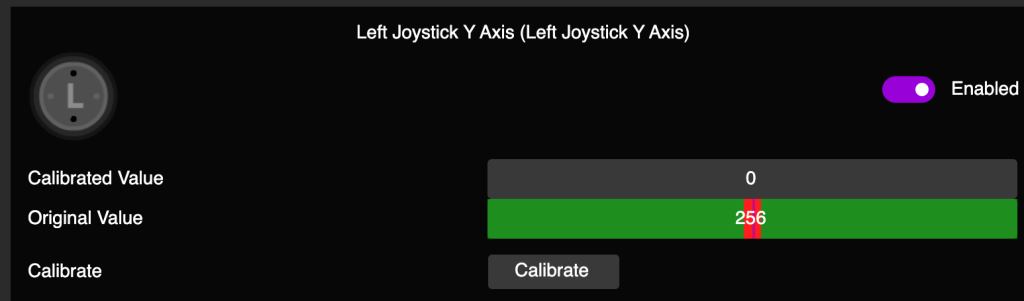
- Click the MIDI Inputs dropdown, then start tapping on your drums while looking through the inputs to find which ones are being activated. Write down the MIDI number at the top of each input for easy reference.
- Refer to the following picture. Value shows the signal sent from your drums to the ACE Adapter. Hit the pads to see the bar move and number go up! There are two modifiers you can change, Threshold and Sensitivity.
- Threshold is how hard you have to hit before the game detects an input. Raising this requires you to hit harder. You want to change this if your light hit starts at a high number.
- Sensitivity defines the max range of detection. It determines the loudness or hardness of the hit that the game detects. Lowering this allows hits with less strength to hit louder. You want to change this if your hard hits do not get close to maxing out the Value meter.

- Some pads are more sensitive than others, so we suggest going through each pad/cymbal/input and adjusting to your liking.
- Once you’re satisfied with calibration, click “Save Settings” on the left side of the window. Once the programming tool has finished writing the firmware, it will show “Status: Done” and 100%.
- Close the software. Load up your favorite game and play! Or plug into your console and play!
Turntable Tuning (incomplete)
Click here for a step-by-step Turntable Tuning guide.
Gamepad Thumbstick Tuning (incomplete)
By default, thumbstick deadzones are set to zero. Due to this, all controllers will drift even if brand new due to the nature of thumbstick margin of error.
Click here for a step-by-step Gamepad Thumbstick Tuning guide.
- To use gamepads with the RCM 360 Wireless Receiver Adapter, you must first change the preset to Gamepad. Click here to be taken to the step-by-step programming guide.
- Plug the V3 Adapter into your computer if not already, then open RCM Programming Tool. Once the programming tool detects your adapter, click “Configure“.
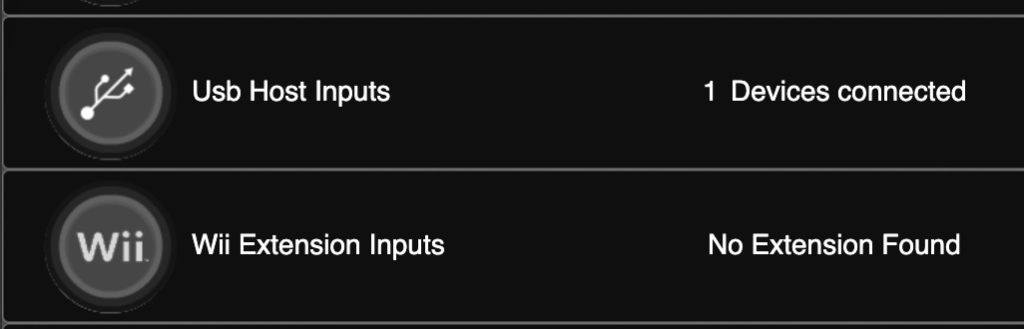
- Plug in your gamepad. You should see “1 Devices connected” appear next to either USB Host Inputs or Wii Extension Input, depending on what type of gamepad you plugged in.
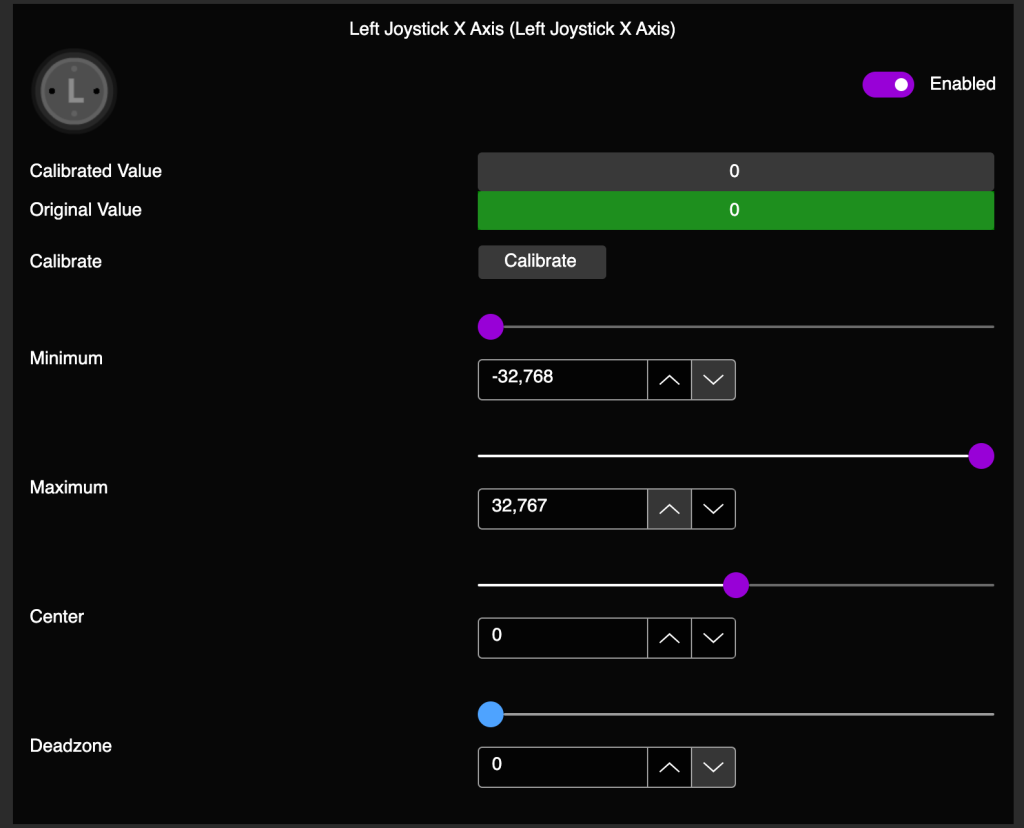
- Click the dropdown with whichever type of input you plugged in, then scroll to the thumbsticks. There should only be four inputs. X and Y axis for both thumbsticks.
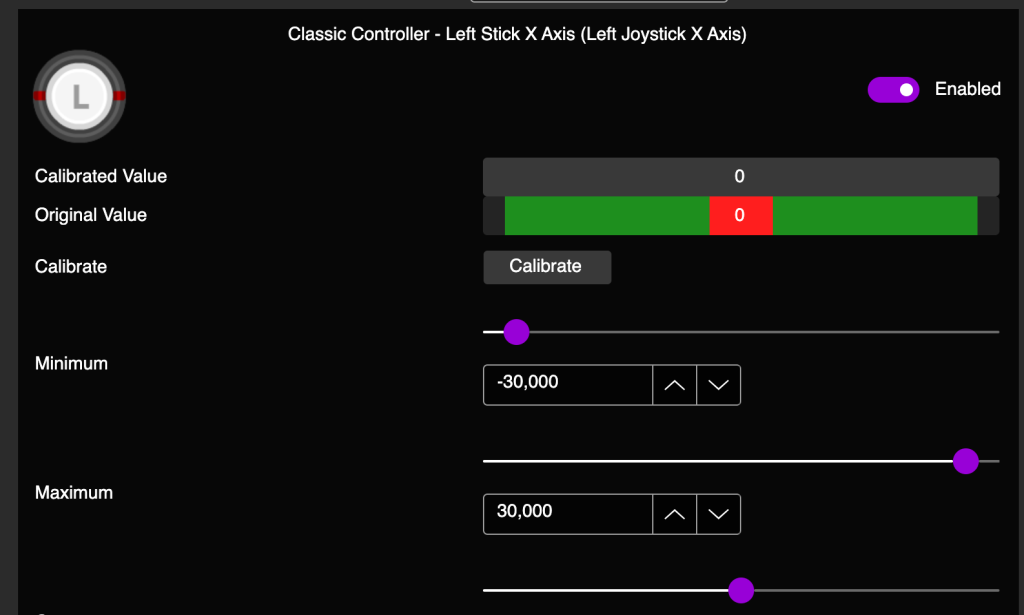
If you are using a Wii Classic Controller, you will see this instead:
- Move both stick around and see the values that they idle at once you release. Adjust the deadzone to be a bit higher than the idling number. Once you set this, click Save Settings on the left side of the window. You can also use the Calibrate feature, which you then just need to follow the steps of.
- Optionally, you can set deadzones for triggers if those are experiencing any erratic change in idle value.
Troubleshooting
My RCM 360 Wireless Receiver is not appearing in the RCM Programming Tool
There are various reasons for this occurring.
- It may be in keyboard mode, set that switch to OFF.
- The USB cable may be malfunctioning, try a different one.
- The USB port on the computer may be malfunctioning, try a different one.
If you aren’t able to get it to work, send us an email at support@retrocultmods.com