SG Revival Kit Installation Guide
Introduction
This is an instructional guide for the RetroCultMods Revival Kit for the PlayStation 2 Gibson SG guitar. This build can be completed in under an hour and a half, but can take longer if you are thorough with the cleaning process. If you run into any issues during the build or have questions, click here!
Parts Included
- Revival Kit Zeroboard (Strumboard/PCB)
- Revival Kit Fretboard
- 5x 3D Printed Translucent Frets
- 3D Printed Translucent Strumbar for SG
- 3D Printed Kit Hardware
- Replacement Start/Select board for SG
- TwinTail USB-C and Authentication Cable
- Hall Effect Whammy Assembly
- Kits ordered before September 9th, 2026 have the potentiometer Whammy Assembly. This has a specific set of instructions in the whammy install section.
- Switch Puller
- Color Coded Wires
- 10 foot nylon braided USB-A to USB-C cable
- Tube of lubricant
Required Tools (not included)
Step-by-Step Installation Guide
1. Opening the Guitar
Flip the controller over so the Red Octane sticker on the back of the body is visible.
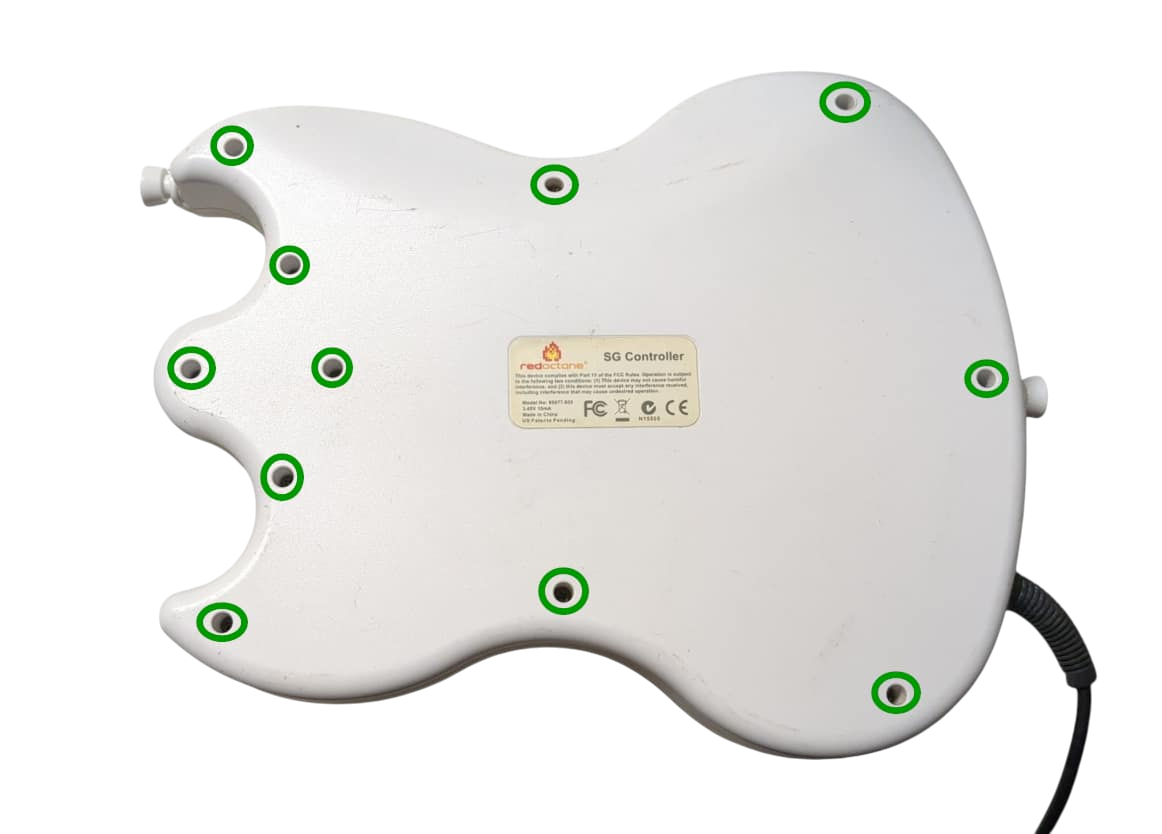
Rear body shell –11x screws
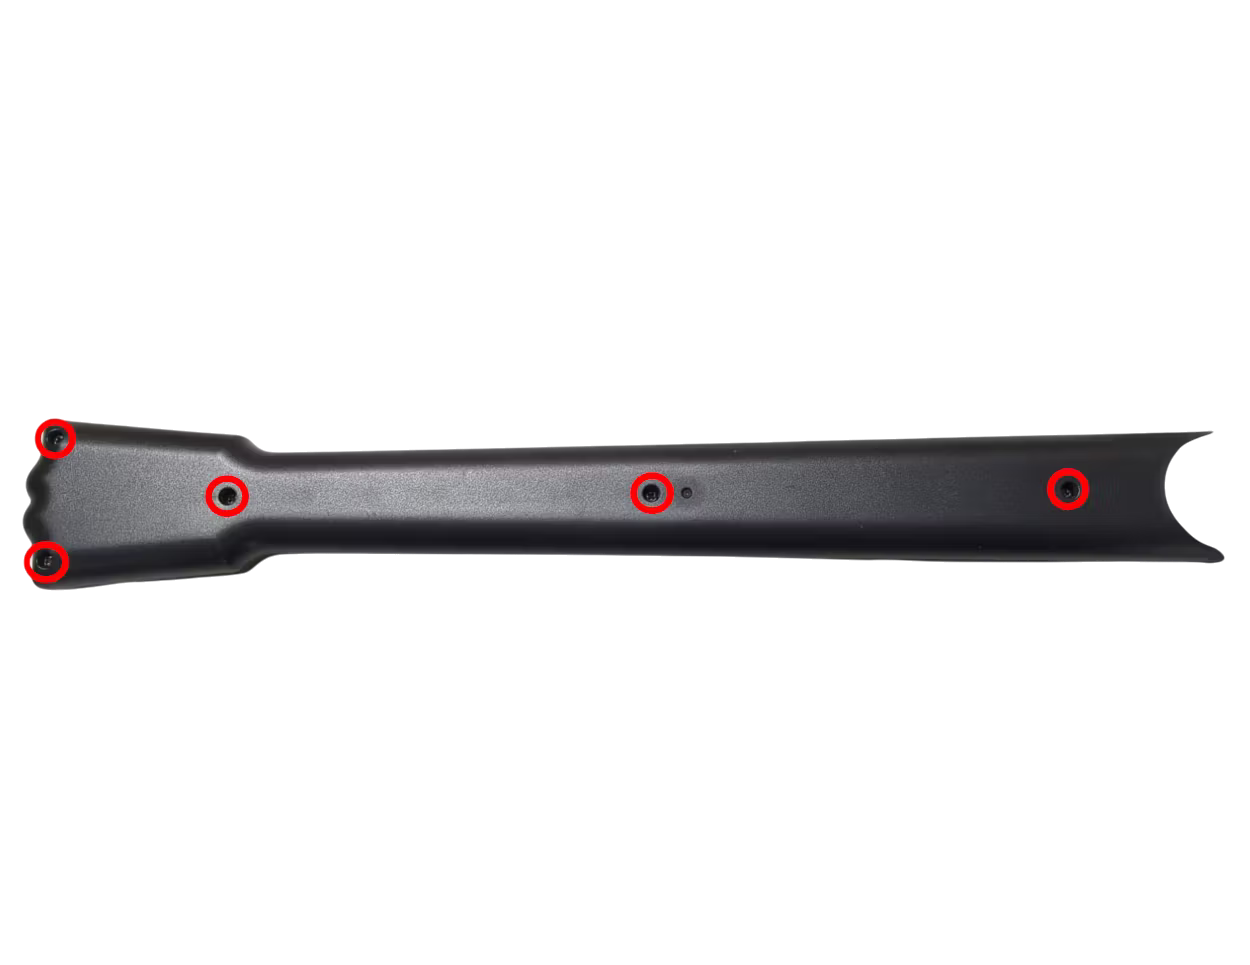
Rear neck shell – 5x screws
Ensure that all screws are removed, and open the shell.
Once the shell begins to open, slowly move down the rest of the shell until it pops open completely.
Repeat this process for the neck, using the opening at the neck connector and working towards the headstock.
If the shell seems to get stuck, DO NOT FORCE IT. Check to make sure you have removed all of the screws before continuing to pry the shell.
2. Removal of Original Parts
Now its time to remove the stock boards that will be replaced with the new boards included in the kit.
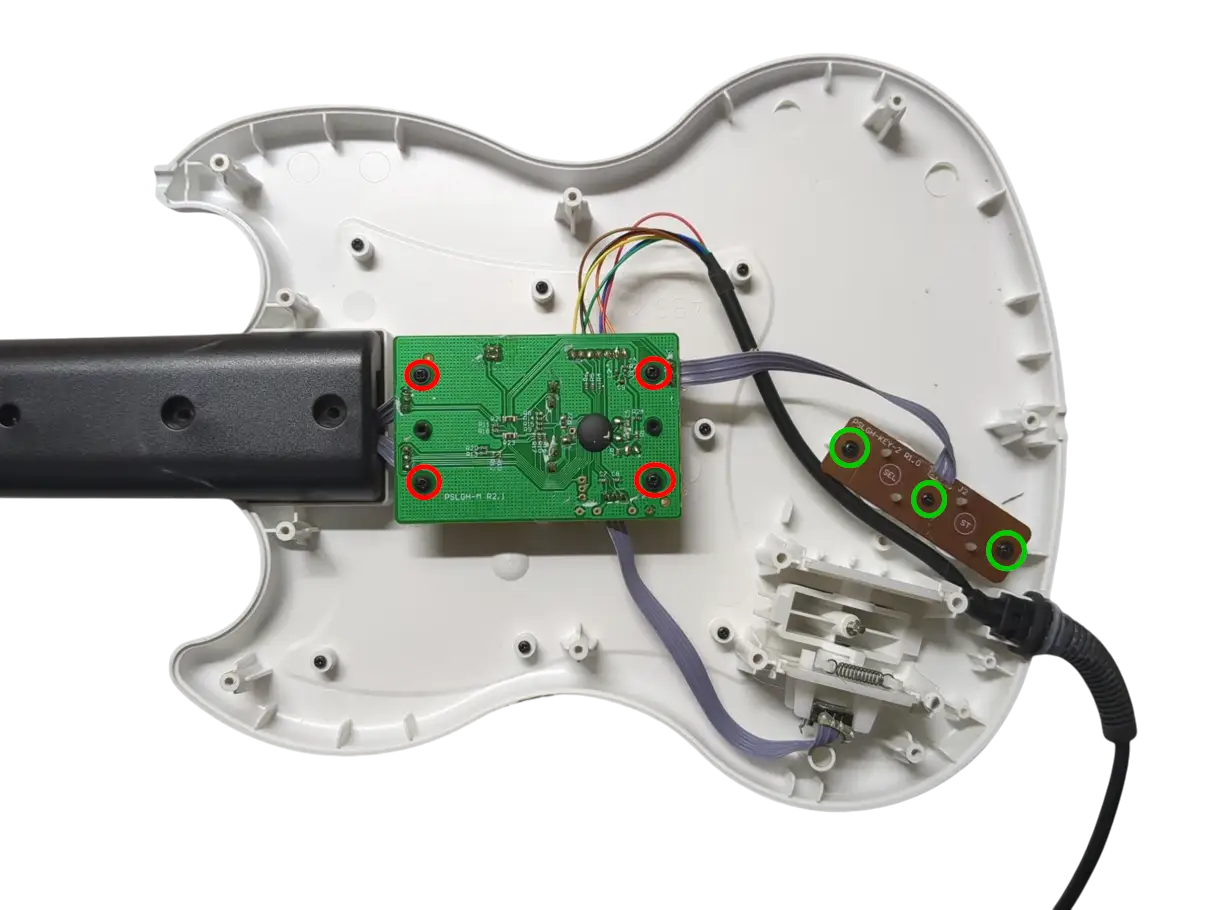
Strum Board - 4x PH1 Screws
Start/Select board - 3x PH1 Screws
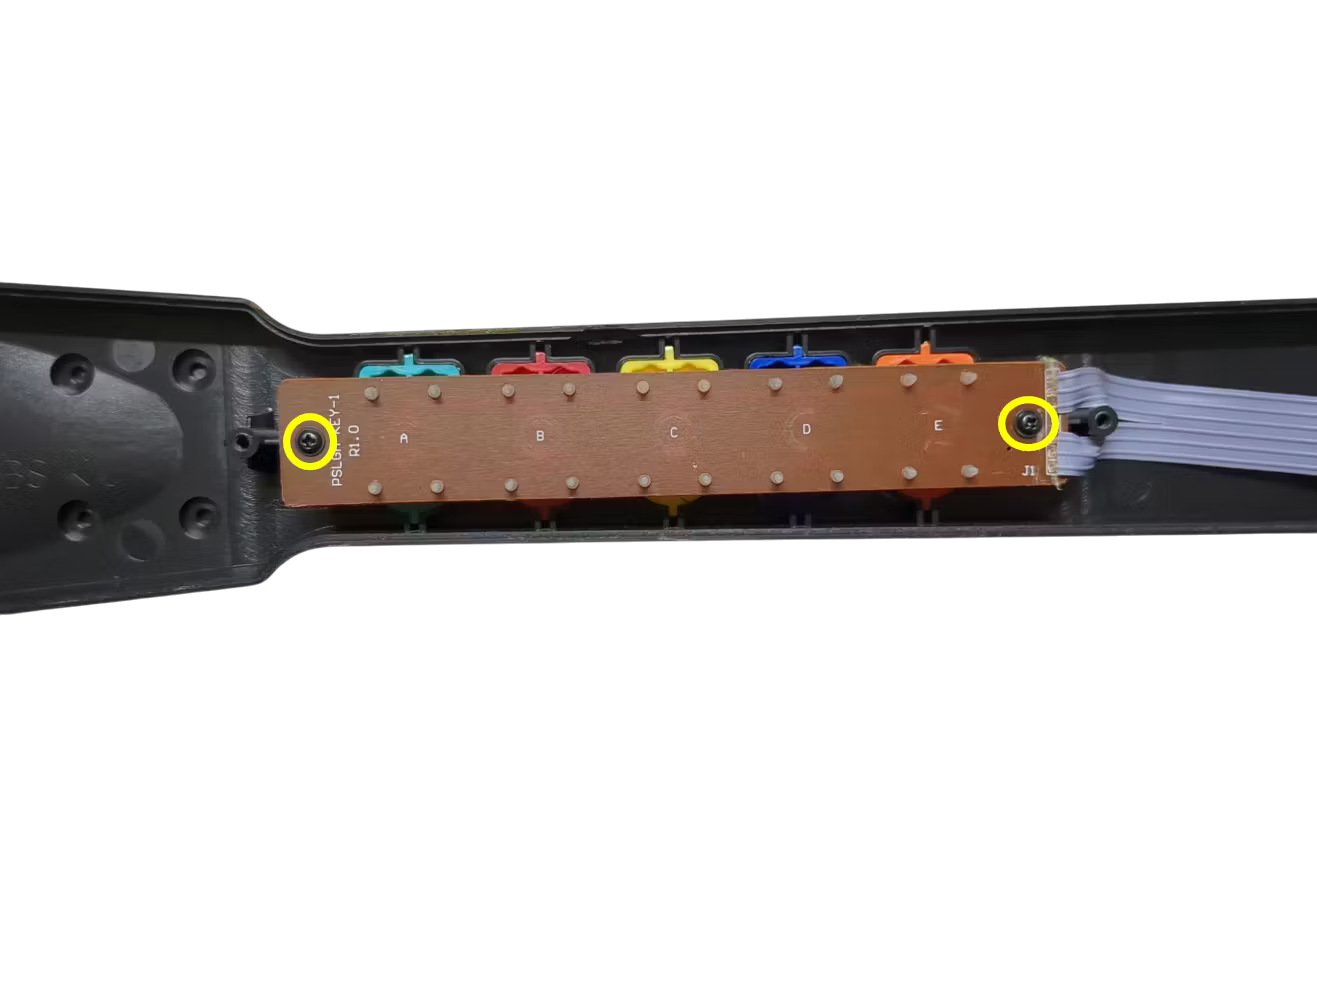
Fretboard - 2x PH1 Screws

Wiggle the wires near the whammy potentiometer until they break free or use scissors to cut the wires.
Once all the screws are removed, remove all of the stock boards. Do not remove the whammy assembly.
3. (Optional) Clean Your Guitar
In this step, we take a little bit of time to clean some parts of the guitar. We suggest being more thorough in your cleaning, as your guitar may have finger grime from way back in the day! A bit of rubbing alcohol and/or soap and water can go a long way. Make sure the parts are fully dry if you clean with soap and water. Pro tip: Toothbrush, Dawn soap, and water.
4. Test Your Revival Kit
Before installing the Revival Zeroboard/Strumboard and Revival Fretboard, they should be tested for proper functionality.
Gather the Revival Kit Fretboard, 3 white wires, and 10ft USB-C cable
Plug the Revival Fretboard into the Revival Zeroboard/Strumboard using the three included white cables. Make sure that each connection goes to the proper port. It is suggested to go one by one while installing.

Plug in Fret 1, Fret 2, and RGB to the Revival Fretboard

Plug in Fret 1, Fret 2, and RGB to the Revival Strumboard
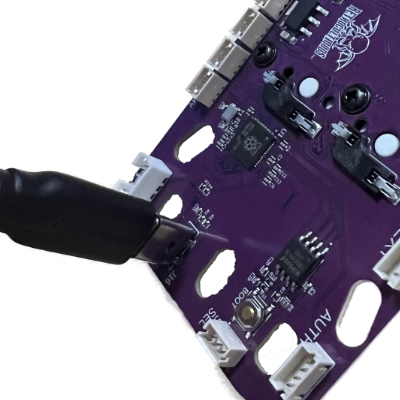
Plug your Revival Zeroboard/Strumboard into your computer, using the USB-C to USB-A cable included in the Revival Kit. You will plug it into the vertical USB-C port on the Zeroboard.
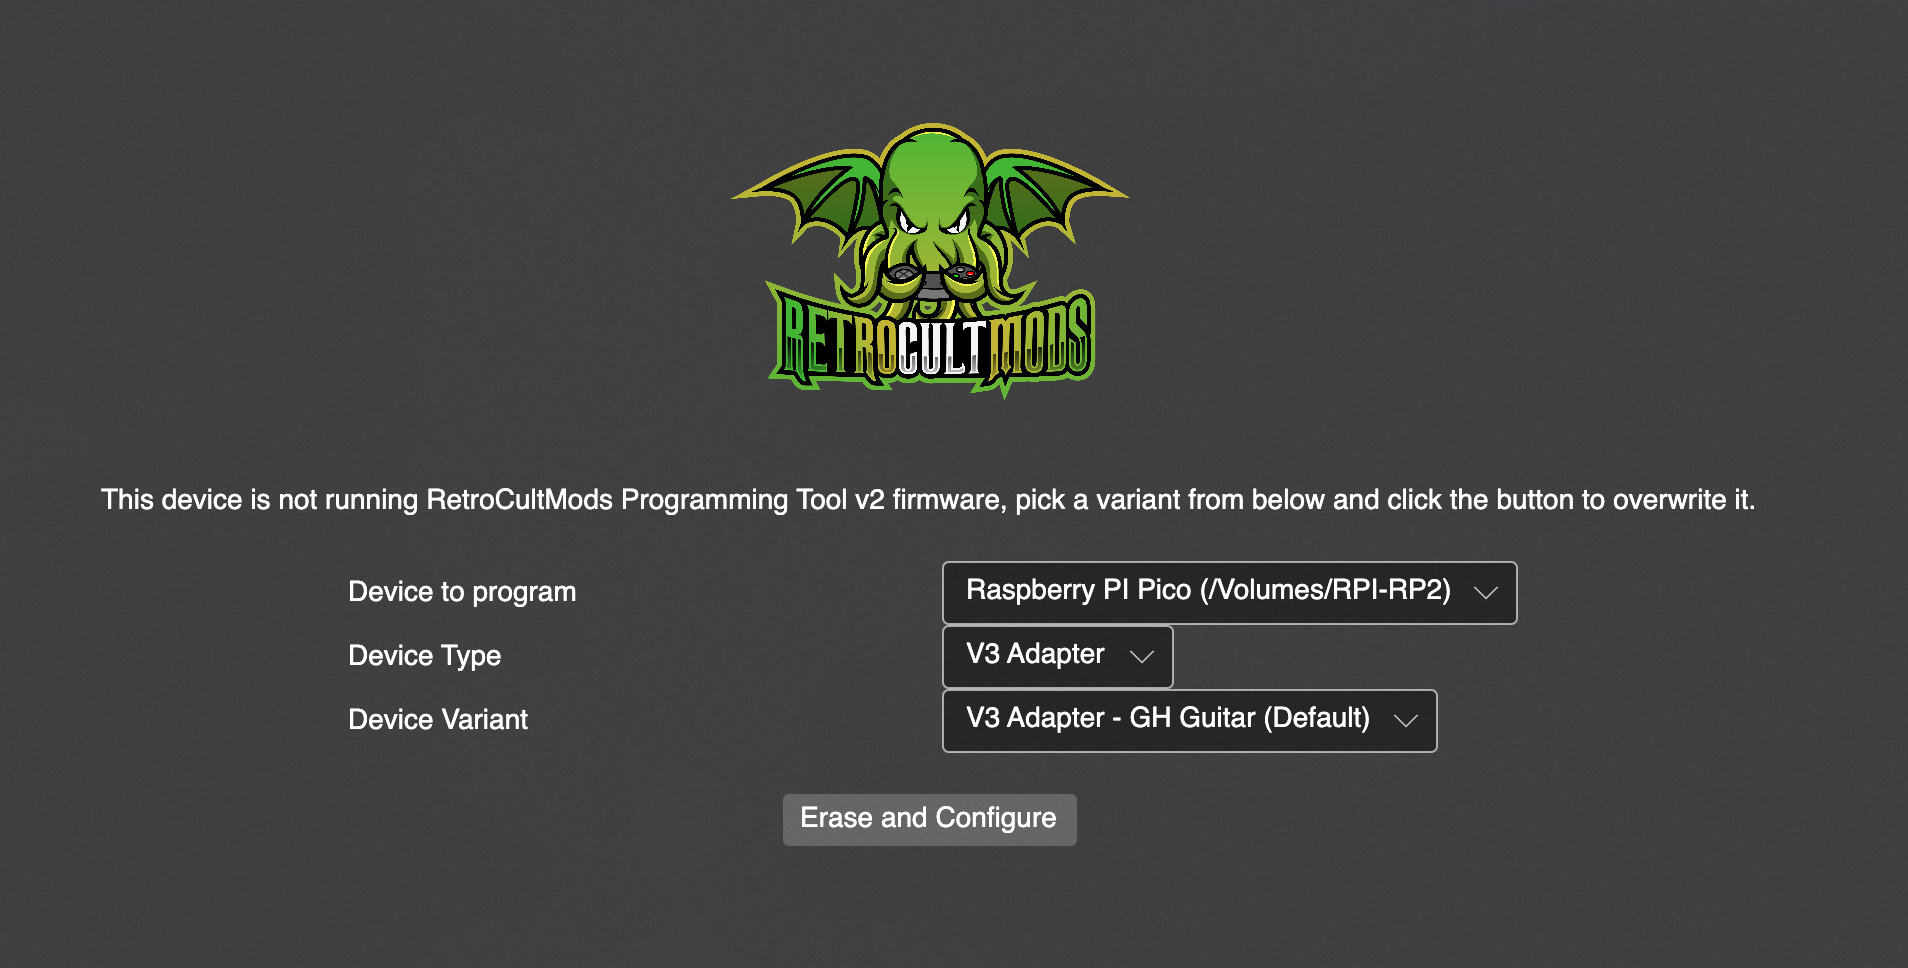
Open the RCM Programming Tool (click here to go to the download page). If the following screen appears for you, make sure to switch the DEVICE TYPE to "Revival Kit". Click Erase and Configure. Do not touch the device while it is being programmed.
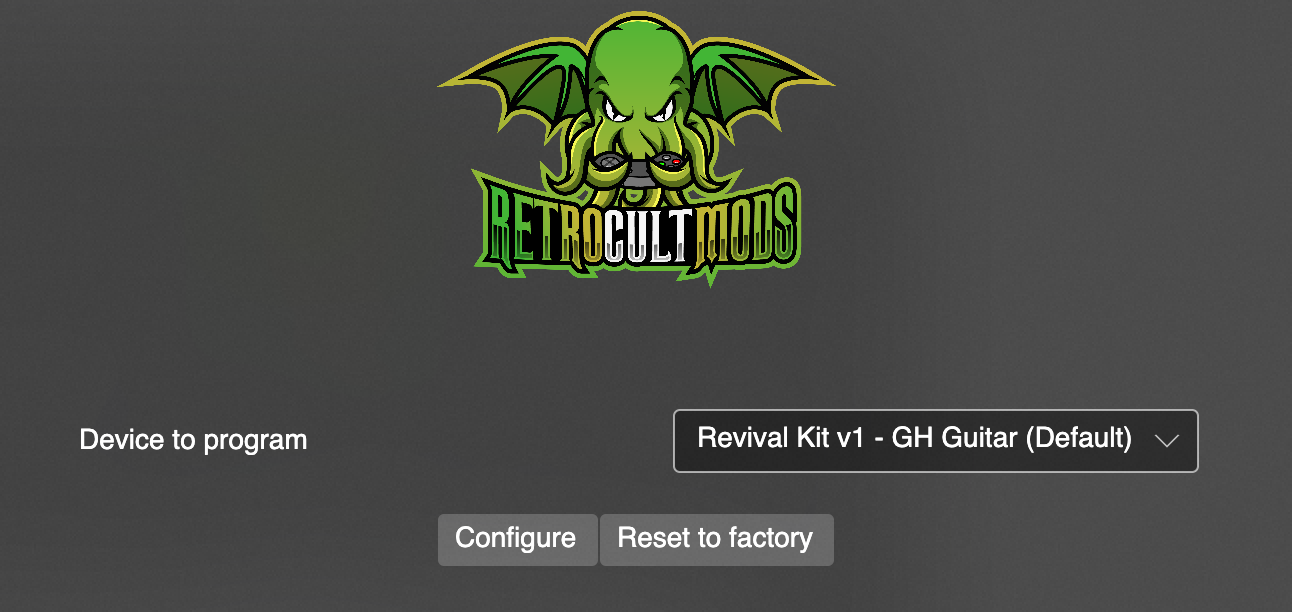
Once the firmware writing is complete, this screen will appear:
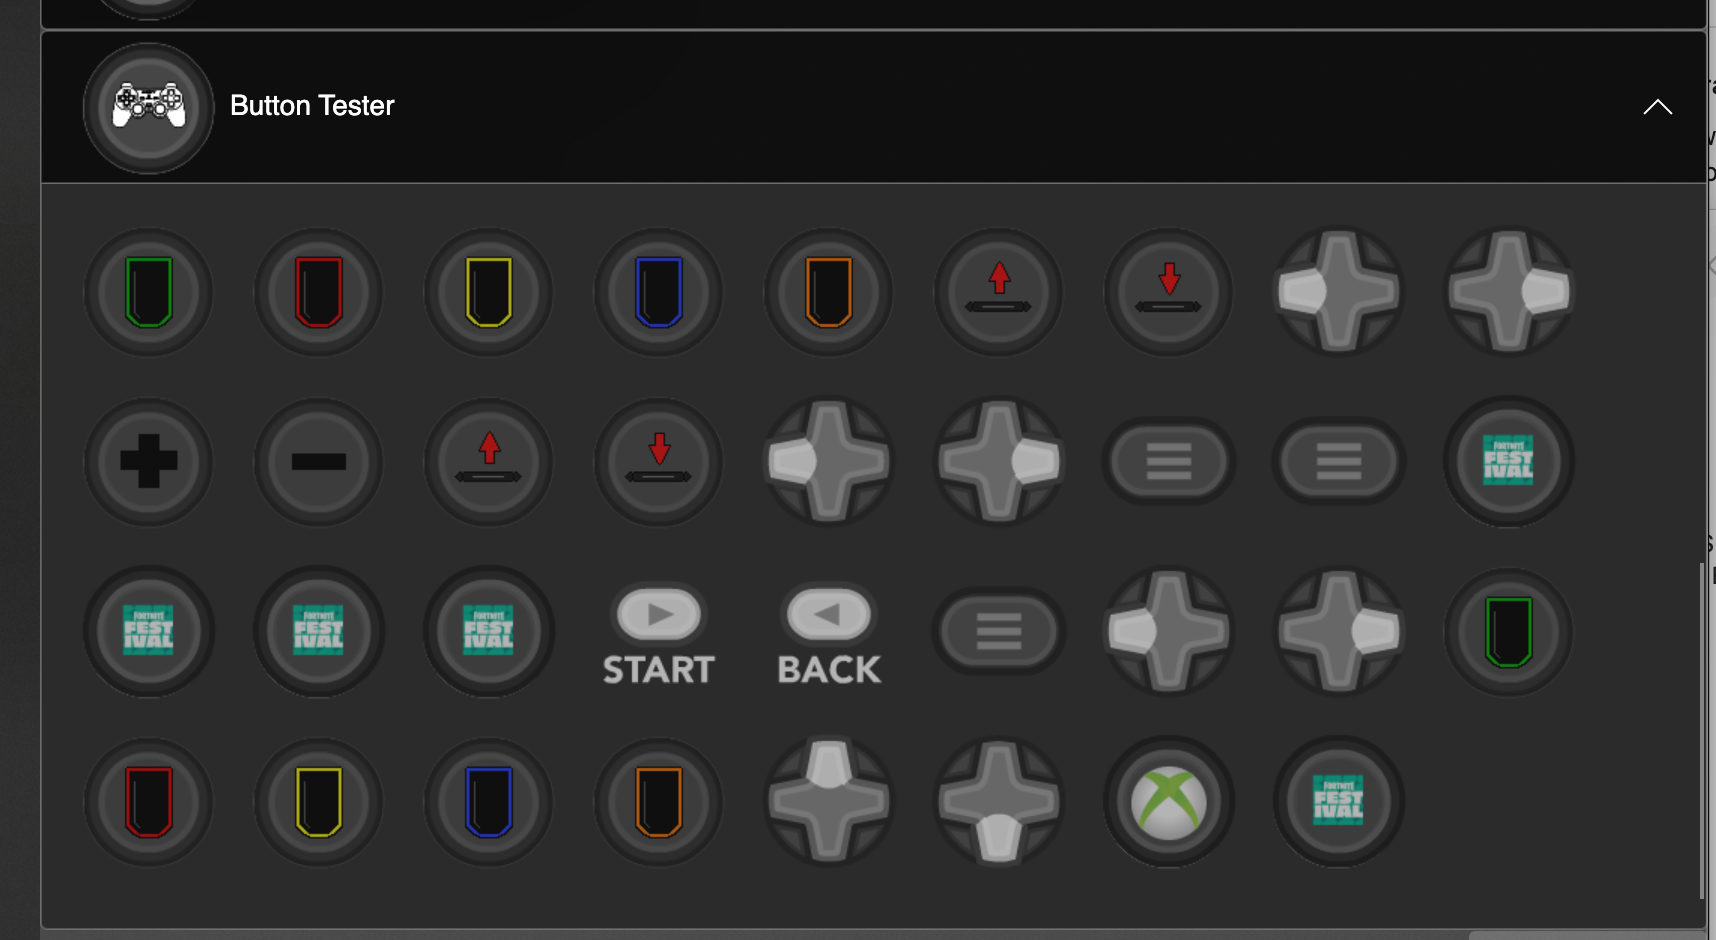
Scroll down to the list of all inputs and then start pressing the fret and strum switches. The respective switches will light up and so will the input in the RCM Programming Tool. Verify that all of the inputs and switches work properly. If not, contact support.
5. Prepping the New Strumbar (RGB Only)
IF YOU DID NOT ORDER THE 3D PRINTED CLEAR STRUM BAR, SKIP THIS STEP.
Before installing the new Strumboard, we need to transfer some pieces of the stock strumbar over to the new one:
Gather the 3D printed strum bar, tube of lubricant, and 3D printed bits from the bag of screws
Remove the two black strum bar brackets, then pull the strum bar assembly out of the guitar.

Remove the metal strumrod by pulling it out of the stock strumbar.

Remove both of the circular spacers on each end of the strumbar. You can easily remove these by pushing them out with your finger from the inside of the strumbar.

Remove the four rubber pads on each foot of the strumbar. These can be lifted straight out of their slots.

Make sure you have all the stock parts you need:
- 1x Metal strumrod
- 2x Circular spacers
- 4x Rubber pads

Find the white tube of lubricant and apply a very small amount on each end of the metal strumrod, where it makes contacts with the circular spacers. Use for finger or a qtip to spread the lubricant out; we want only a thin layer of lubricant on the ends of the strumrod!

Put all of these parts into the new strumbar, in the same places as the stock strumbar. Insert the rubber pads into the slots in each of the feet of the new strumbar, insert the spacers into the circular cutouts on each end of the new strumbar, then insert the metal strumrod through the spacers.

If the strumbar slides up and down the metal rod too much for your liking, then you can install the wide, thin spacers included on the end of the component piece to fill in the gap. Place these under the stock strumbar spacers. You may need to stack multiple on each end to get your desired tolerance!

6. Installing the Revival Zeroboard (strumboard)
Gather the new strum bar assembly, Revival Strumboard, small strums witch inserts from 3D printed bits in bag of screws, and 4 long screws
Slide the metal rod into the new strumbar. Then place the new strumbar into the slot that the stock strumbar sat in. Put the black brackets back into place.

Separate the small strum keycaps from the component piece and slot them into the stems of the strum switches. This is needed for a tighter strumbar feel.

Place the new strumboard on top of the black brackets, then screw in the new strumboard. If the stock screws are stripped, you can use the replacement Long Screws provided in the kit. Make sure each screw is snug, but do not over-tighten them, or you may scratch away the soldermask of the new strumboard!

7. Installing the Revival Fretboard
Gather the Revival Kit Fretboard, Translucent Frets, 3 White Wires, and 2 Long Screws.
Connect one end of each of the White Wires into the RGB, FRET1, and FRET2 connectors on the Fretboard. Connect the other end of each White Wire to the corresponding RGB, FRET1, and FRET2 connectors on the Strumboard. We recommend doing one wire at a time to prevent mixing them up.
Plug in Fret 1, Fret 2, and RGB to the Revival Fretboard
Plug in Fret 1, Fret 2, and RGB to the Revival Strumboard
Remove the stock silicone pad and frets if they are still in the fret slots. Wipe the inside of the fret slots clean if they are dirty. Then apply a small amount of lubricant to your finger or a qtip and lightly coat the inside of the fret slots with lubricant. Make sure to wipe away any excess lubricant that may have spilled to the front of the neck shell!
Insert the translucent 3D printed frets provided in the kit. These frets must be used even if you do not want to use LEDs; the stock frets will not fit with the new Fretboard.

Place the new Fretboard onto the screw standoffs that the stock fretboard used to sit on (the red switches and white connectors should be facing down towards the Translucent Frets. Use 2 Long Screws to secure the new Fretboard.

Route the White Wires through the neck and down through the body. Make sure they are clear of any screw standoffs so they are not damaged when reinstalling the neck shell. Using a bit of tape to hold down the wires internally can help with management.

8. Installing the Start/Select Board
Gather the new Start/Select board (labelled A1) and two long screws.
Swap the silicone domes on the stock start/select board onto the new board.
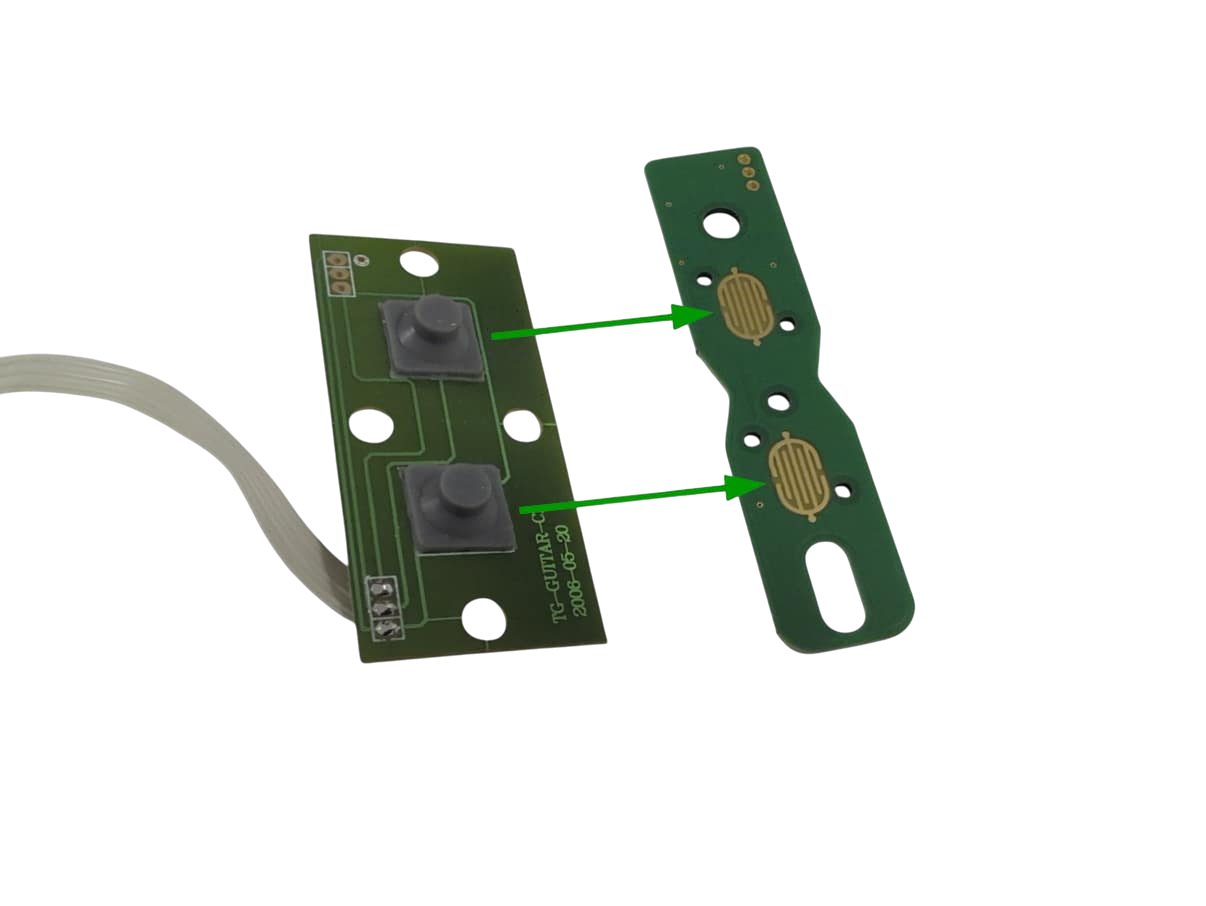
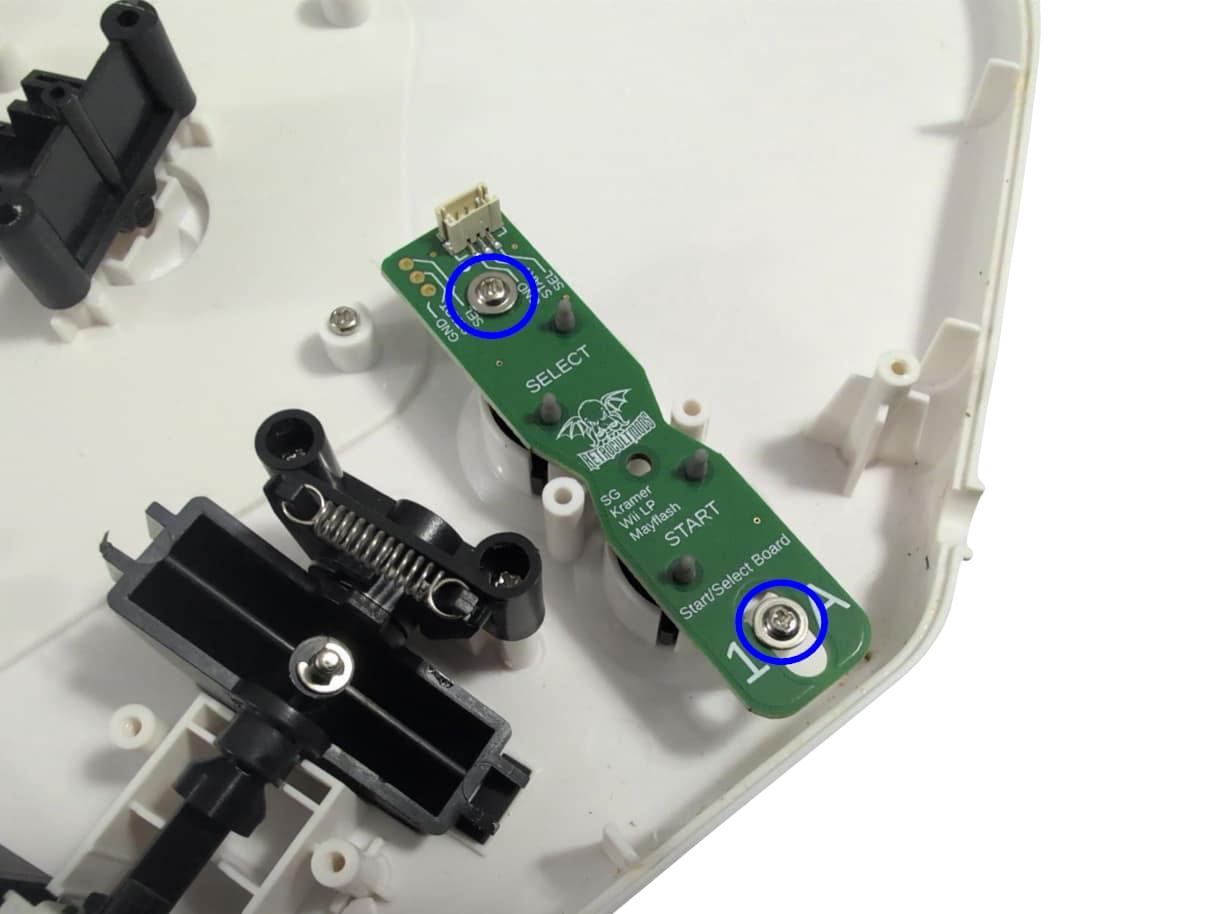
Secure the new Start/Select board in the place of the stock Start/Select board, positioned with the white connector closest to the Strumboard. The original screws will likely be too small to cover the slots of the new board, so the provided screws can be used instead.
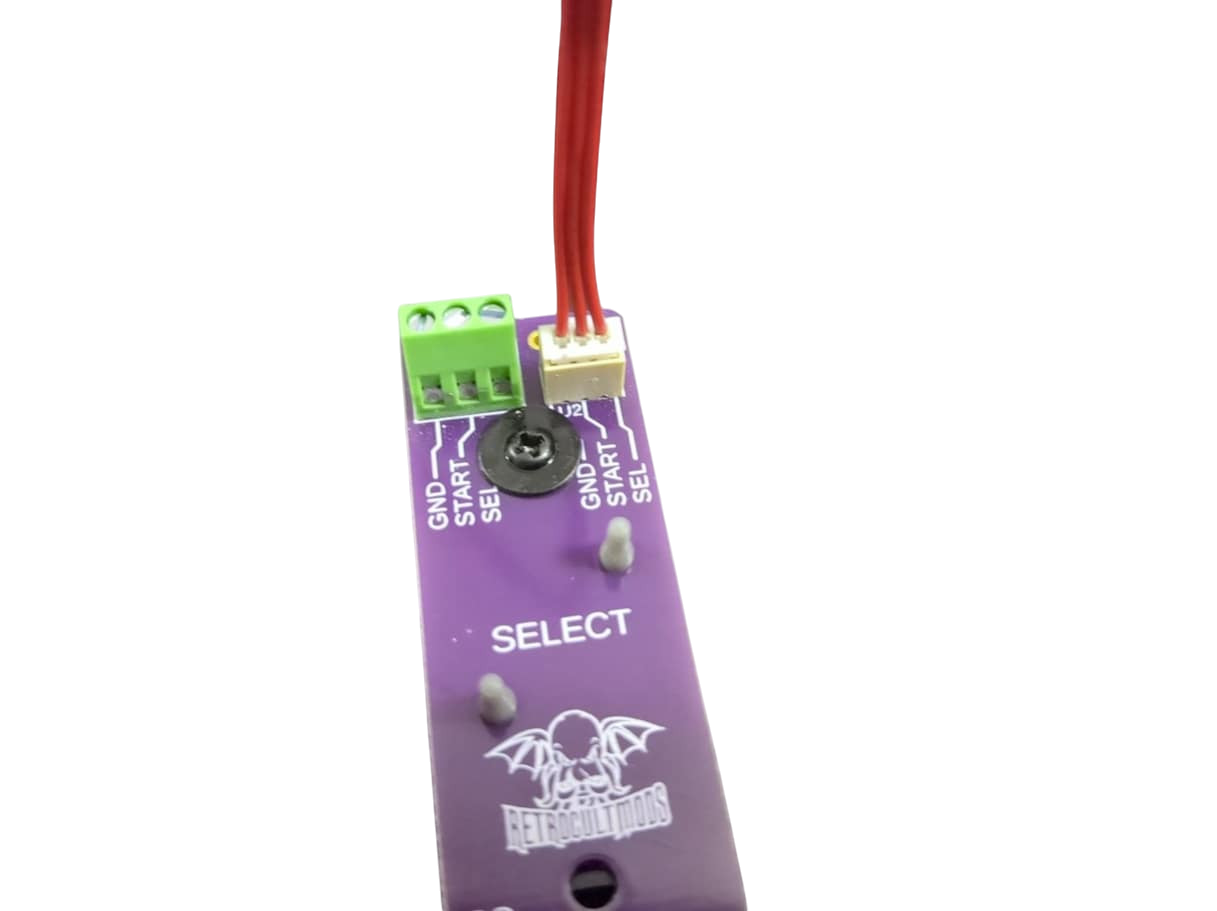
Connect one end of the Red Wire into the white connector on the new Start/Select board.
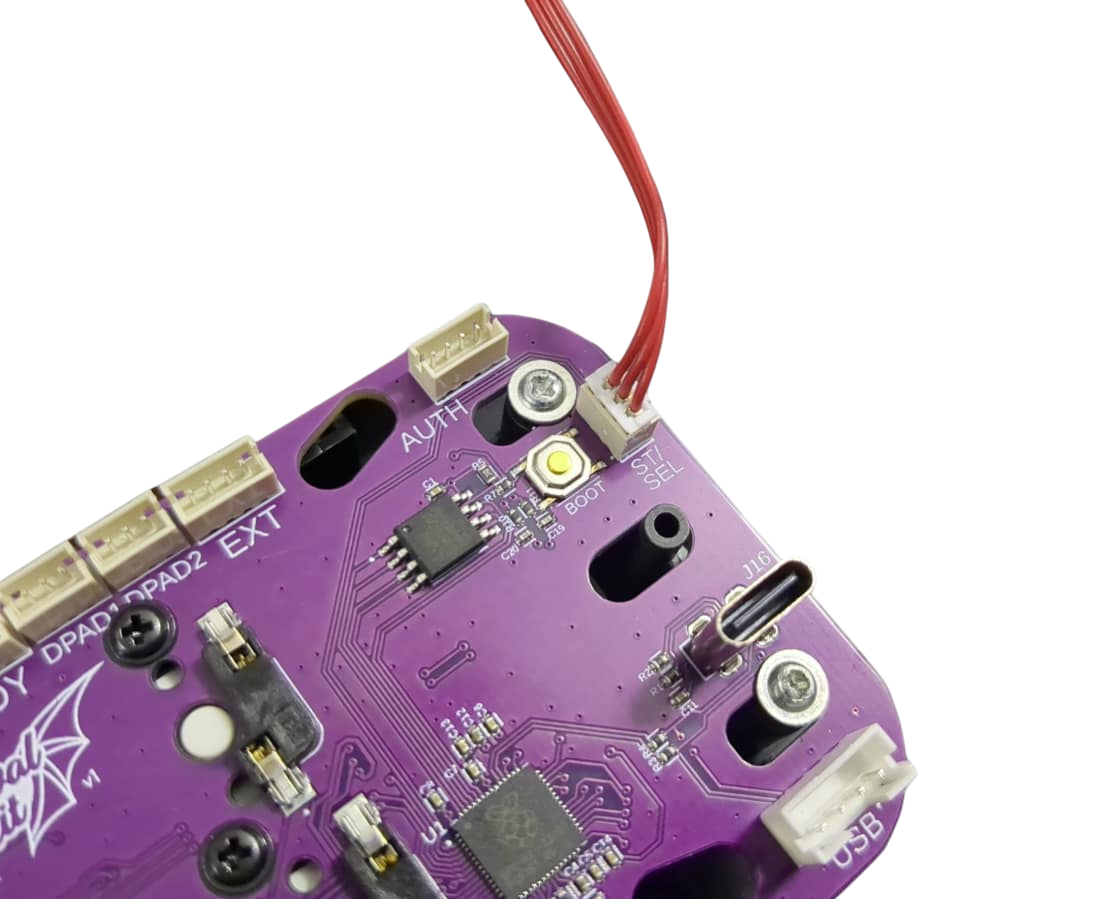
Connect the other end of the Red Wire into the white ST/SEL connector on the Strumboard.
9. Assembling and Installing the Whammy
Revival Kits ordered after September 8th, 2026 have the new hall effect whammy sensor design.
Gather the following parts: Hall Effect sensor, Magnet Bracket, Adhesive pad, and black connector cable.

Peel back the red film on the adhesive pad and place it on the empty area of the Hall Effect Whammy board. Tweezers will make this much easier!

Peel the white film on the adhesive pad and position the board onto the inner shell of the guitar with the black rectangular sensor close to the edge of the black plastic whammy assembly as pictured. Make sure the board and the assembly are not touching.

Locate the magnet bracket and slide the magnet into the slot on the front of the bracket. Push it in until it is about flush with the opening of the slot.

Line up the seam on the underside of the bracket to the thin wall in the center of the whammy assembly. Press the bracket down onto the assembly as far as it will go.

Connect one end of the black wire to the connector on the sensor board.

Connect the black wire to the WHAMMY connector on the Zeroboard.

The following video is a guide for installing the previous whammy design.
10. Installing the USB-C Port + Authentication Twintail Cable
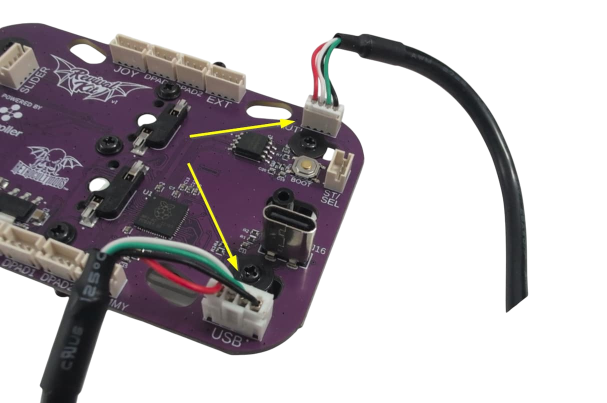
Plug the larger white connector on the other end of the cable into the USB connector on the new strumboard. Connect the smaller one into AUTH.
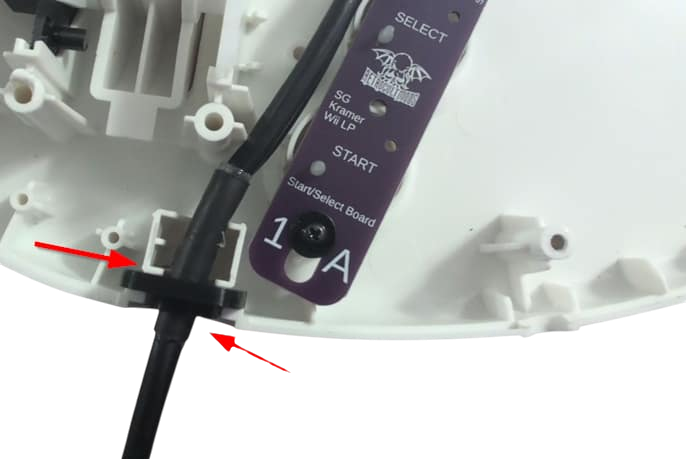
The cables must be inserted through the bottom strap peg hole like below. Make sure that the cables are not in the way of any screw holes or posts. [IMAGE COMING SOON]
11. Test Inputs
Plug your guitar into your computer using the new USB-C port you installed!
Open the RCM Programming Tool on your computer (click here to go to the download page) If the following screen appears for you, make sure to switch the DEVICE TYPE to "Revival Kit". Click Erase and Configure. Do not touch the device while it is being programmed.

You will then be brought to this screen, click Configure.

Scroll down to the list of all inputs and then start pressing the frets and clicking the strum bar. The respective switches will light up and so will the input in the RCM Programming Tool. Verify that all of the inputs and switches work properly. If not, contact support.

12. Closing the Guitar
You're almost done! Once you have ensured that each input works, we can close up the guitar! Make sure none of the wires are in the way of any plastic standoffs, as this will damage them when closing the shell. We would recommend taping down the wires to ensure they are out of the way and not draped across any of the boards. With the front body and neck shell facing down, put the rear neck shell onto the front neck shell. You may need to apply pressure to close the shell. If you feel like part of the shell will not snap into place, open it up and double check that there is nothing blocking the standoffs. Repeat for the body shell. After both sides of the body are connected, install all of the screws you removed earlier
Rear body shell –11x screws
Rear neck shell – 5x screws
13. Calibrate Tilt and Whammy
Tilt
Open RCM Programming Tool if you do not already have it open
Scroll to the Tilt section. Click on it to open the dropdown menu.
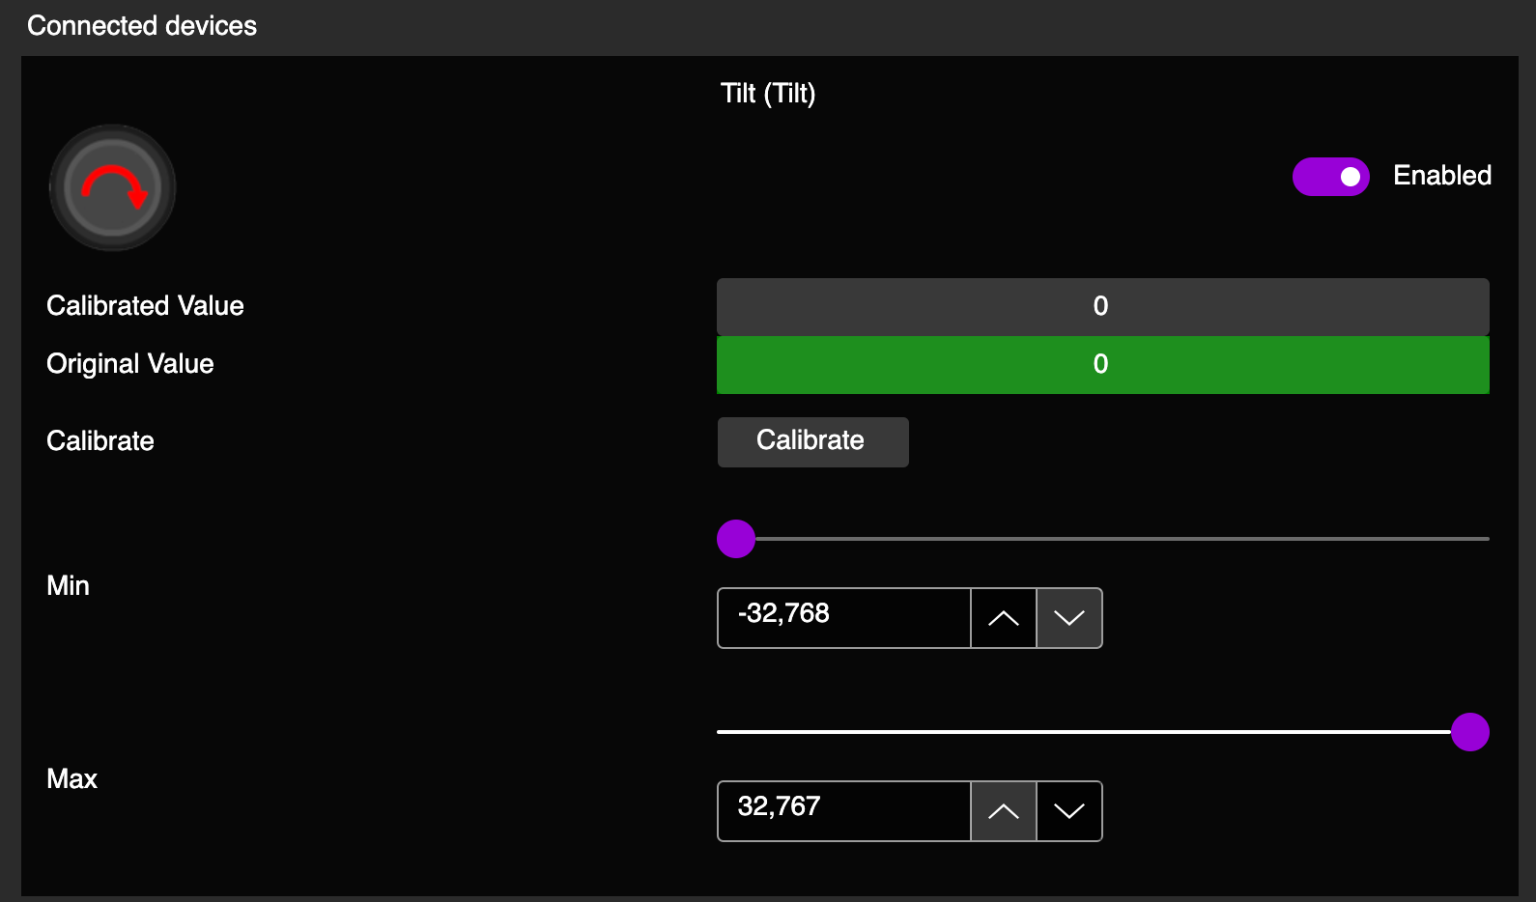
Click the calibrate button.

Hold the guitar in the position you would play in normally. Click Next while holding it there.
Tilt to the angle you want the Star Power/Overdrive to activate at. Click Next while holding it there.
Whammy
Open RCM Programming Tool if you do not already have it open
Scroll to the Whammy section. Click on it to open the dropdown menu.

Leave the whammy in its resting position (as in don't press it down). Click Next.
Press the whammy down into its lowest position until it comes to a stopping point. Hold it there and click Next. You can release the whammy bar now.
Now you're setting the Deadzone. Push the whammy bar down ever so slightly to observe the value moving around. You want it to have a little bit of force required before the whammy begins activating. Once you've found the sweet spot for your guitar, hold it there and click Next.
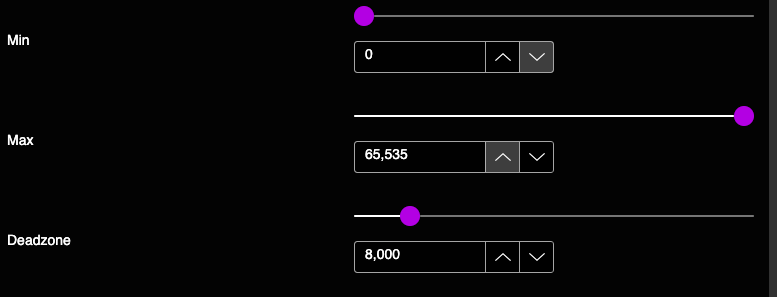
You're done calibrating! You'll see the Calibrated Value go up and down and you press your whammy. What you want is for the Calibrated Value to not display anything when you're not touching the whammy bar.
14. Configure Fret and Strum Bar Colors
Open RCM Programming Tool if you do not already have it open
Scroll to the fret and strum inputs and click the arrow to reveal the color selectors for your chosen input.


Click on the arrow for the pressed or released LED color to open the color picker menu:

Change this to whatever color you want!
Click Save Settings when you've configured all of the colors that you want.

15. Finishing Up, Factory Resets and Updates
To wrap up this installation, the last things to know are how to factory reset and/or update the guitar.